
Image credits: David Clode at Unplash
[FR] Exécuter un exemple simple sur Marbec-GPU
Tout au long de ce tutoriel, vous trouverez tout ce dont vous avez besoin pour éxécuter un script Python ou R (afficher “Hello World <3”), ainsi que des conseils et des ressources supplémentaires qui vous seront utiles pour d’autres tâches sur Marbec-GPU.
Il y a deux grandes manières pour exécuter un programme sur Marbec-GPU. La première est d’utiliser un script de soumission de tâche, la deuxième est d’utliser la session de manière intéractive. Dans cet exemple, nous allons utiliser la première méthode qui est de loin la plus adpatée et facilment adaptable pour des programme plus complexe.
Lorque vous voudrez exécuter un programme plus complexe, assurez-vous que votre projet fonctionne localement (sur votre ordinateur personnel). Cela signifie configurer votre environnement correctement et déboguer votre script localement. Une fois que tout fonctionne avec succès sur votre PC (même en utilisant seulement 1% de l’ensemble de données si vous rencontrez des contraintes de calcul), vous pouvez ensuite déployer votre projet sur Marbec-GPU.
Commencez par créer un dossier de travail dans lequel les différents fichiers seront créés. En commande bash cela donnerait :
cd ~ # aller dans le répertoire personnel
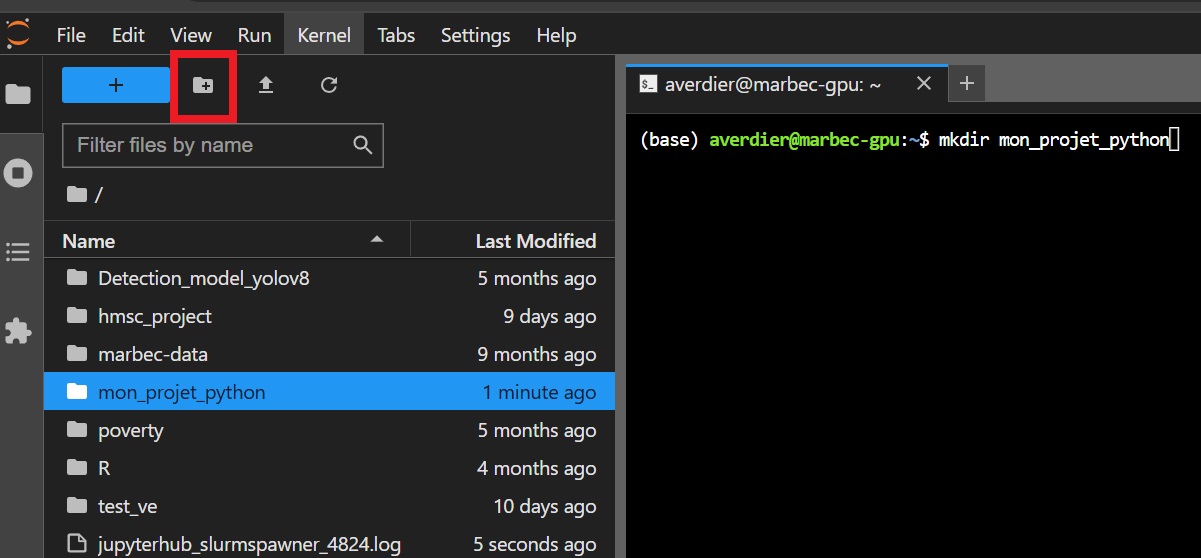
mkdir mon_projet_python # créer un dossier pour le projetSinon il est possible d’utliser l’interface Jupyter pour créer un dossier de travail avec l’icone encadrée en rouge ci-dessous :
Placez vous ensuite dans ce dossier ( cd mon_projet_python/ ou doucle clic sur le dossier visible sur la gauche de l’interphace).
Étapes
Il y a trois étapes principales pour soumettre avec succès une tâche sur Marbec-GPU :
1. Préparer le script Python ou R
Créez un script python ou R simple qui affiche “Hello World <3”. Voici un exemple de script :
print("Hello World <3")Enregistrez ce script dans un fichier nommé main.py ou main.R (en fonction du languge voulu) dans le dossier de travail que vous avez créé précédemment.
2. Préparer un script Bash avec les arguments SLURM
Afin de d’exécuter correctement le script vous aurez besion de créer un script bash launch.sh en prenant soin de mentionner :
- les arguments SLURM, permmant de spécifier quelles ressources allouer, le nom du job, le fichier de sortie, etc.
- l’exécution du script Python/R.
Voici un exemple minimal de script bash :
#!/bin/bash

#SBATCH --job-name=my_job     # Job name
#SBATCH --output=job_%j.out`  # Standard output and error log
#SBATCH --gres=gpu:0          # Number of GPUs (optional)
#SBATCH --mem=4G              # Memory allocation (4 GB)
#SBATCH -c 1                  # Number of CPU cores

# execute python file
python main.py

# execute R file
Rscript main.R
Il possible de spécifier d’autres arguments SLURM. Pour plus d’informations sur les arguments SLURM, vous pouvez consulter la documentation officielle de SLURM ici.
3. Exécuter le script Bash
A l’issu des 2 étapes précédentes, le dossier de travail devrait contenir les fichiers suivants : launch.sh et main.py/main.R : 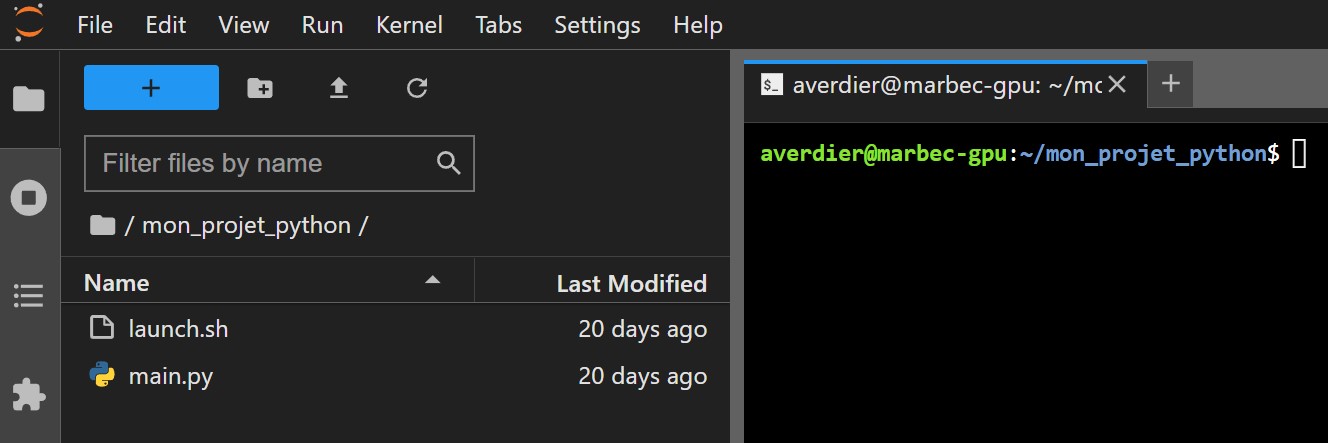 La dernière étape consiste à soumettre votre script
 launch.sh créé à la partie précédente. Pour cela vous devez utiliser la commande sbatch (voir documentation).
Dans le terminal, exécutez la commande suivante :
sbatch launch.shSi les parramètres SLURM (#SBATCH arg) sont bien renseignés, vous devriez voir un message de confirmation de soumission de votre job : Submitted batch job 1234567. Sinon un message d’erreur s’affiche à la place. Lors d’une soumission réussie, SLURM regarde les ressources demandées et place le job en file d’attente ( état PENDING) tant que les ressources ne sont pas disponibles. Une fois les ressources disponibles, le job s’exécute (état RUNNING). Un fichier de sortie est alors créé dans le répertoire courant avec le nom renseigné dans le script bash (#SBATCH --output=job_%j.out). Un deuxième fichier contenant les messages d’erreur peut apparaître si cela est spécifié (#SBATCH --error=job_%j.err).
Il est possible de suivre l’avancement de votre job avec la commande squeue -u $USER ou squeue -j 1234567 (avec 1234567 le numéro de votre job). Mais aussi de lister tous les jobs en cours d’exécution ou en file d’attente avec squeue -O NAME,UserName,TimeUsed,tres-per-node,state,JOBID. La colonne STATE notamment indique l’état du job (PENDING RUNNING). Pour plus de détail sur la command squeue vous pouvez consulter la documentation.
Pour annuler un job (en cours d’éxecution ou encore en file d’attente), utilisez la commande scancel 1234567 (avec 1234567 le numéro de votre job).
Le fichier output.log contenant les sorties de votre script python est créé dans le répertoire courant. Vous pouvez le consulter avec la commande cat output.log ou simplement en double-cliquant dessus. Si tout s’est bien passé, le fichier doit ressembler à ceci :
Hello World <3
[EN] Running a simple example on Marbec-GPU
Throughout this tutorial, you will find everything you need to run a Python or R script (displaying “Hello World <3”), along with additional tips and resources that will be helpful for other Marbec-GPU tasks.
There are two main ways to run a program on Marbec-GPU. The first is to use a task submission script, the second is to use the session interactively. In this example, we will use the first method which is by far the most suitable and easily adaptable for more complex programs.
When you want to run a more complex program, make sure your project works locally (on your personal computer). This means setting up your environment correctly and debugging your script locally. Once everything works successfully on your PC (even using only 1% of the dataset if you encounter computational constraints), you can then deploy your project on Marbec-GPU.
Start by creating a working directory in which the different files will be created. In bash command it would be :
cd ~  # go to the home directory
mkdir my_project  # create a folder for the project
Otherwise you can use the Jupyter interface to create a working directory with the icon framed in red below:
Then move to this directory ( cd my_project/ ).
Steps
There are three main steps to successfully submit a job for a task on Marbec-GPU:
1. Prepare the Python or R Script
Create a simple Python or R script that displays “Hello World <3”. Here is an example of a script:
print("Hello World <3")Save this script in a file named main.py or main.R (depending on the desired language) in the working directory you created earlier.
2. Prepare a Bash Script with SLURM Arguments
In order to run the script correctly, you will need to create a bash script launch.sh taking care to mention:
- The SLURM arguments, specifying which resources to allocate, the job name, the output file, etc.
- Python/R script execution.
Here is a minimal example of a bash script:
#!/bin/bash

#SBATCH --job-name=my_job     # Job name
#SBATCH --output=job_%j.out`  # Standard output and error log
#SBATCH --gres=gpu:0          # Number of GPUs (optional)
#SBATCH --mem=4G              # Memory allocation (4 GB)
#SBATCH -c 1                  # Number of CPU cores

# execute python file
python main.py

# execute R file
Rscript main.R
It is possible to specify other SLURM arguments. For more information on SLURM arguments, you can consult the official SLURM documentation here.
3. Execute the Bash Script
After the previous 2 steps, the working directory should contain the following files: launch.sh and main.py/main.R: The final step is to submit your launch.sh script created in the previous section. To do this, you need to use the sbatch command (see documentation).
In the terminal, run the following command:
sbatch launch.shIf the SLURM parameters (#SBATCH arg) are correctly filled in, you should see a job submission confirmation message: Submitted batch job 1234567. Otherwise, an error message will appear instead. Upon successful submission, SLURM checks the requested resources and places the job in the queue (state PENDING) until the resources become available. Once the resources are available, the job runs (state RUNNING). An output file is then created in the current directory with the name specified in the bash script (#SBATCH --output=job_%j.out). A second file containing error messages can appear if specified (#SBATCH --error=job_%j.err).
You can track the progress of your job with the squeue -u $USER or squeue -j 1234567 command (with 1234567 being your job number). You can also list all jobs currently running or in the queue with squeue -O NAME,UserName,TimeUsed,tres-per-node,state,JOBID. The STATE column in particular indicates the job’s status (PENDING RUNNING). For more details on the squeue command, you can consult the documentation.
To cancel a job (running or still in the queue), use the scancel 1234567 command (with 1234567 being your job number).
The output.log file containing the outputs of your python script is created in the current directory. You can view it with the cat output.log command or simply by double-clicking on it. It should look like this:
Hello World <3